RV Solar Panels

Everyone wants RV solar panels nowadays . Going off the grid with your RV is the latest thing . New RV’s and campers are coming solar ready. So the big question is what does all this mean and what do you buy ?

Batteries

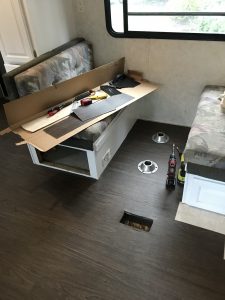
Your batteries are what stores the solar energy . Your rv solar system can be as simple as a way to keep your RV battery charged . Depending on how long you want to be off the grid and how much power you plan on using depends on how how large a of a bank of batteries you want to have .

Series VS Parallel

When you use multiple batteries you can hook them up differently depending on what you are trying to do . In series you are adding the batteries together to increase voltage . Two 6 volt batteries in series will make 12 volts . Two 12 volt batteries ran parallel will be 12 volts with twice the capacity . You can even combine the 2 methods having 2 in series ran parallel with 2 more in series for a total of 12 volts . You probably lost me there so well get to the next part.

Charge Controller

Your solar panels don’t know when to stop charging your batteries. Your charge controller manages this to make sure your expensive bank of batteries isn’t overcharged . To pick a charge controller you need to first know how much charging current you will have as well as the load current that can be expected so it is sized right for your application .

Inverter

An Inverter converts DC power to AC power . Most campers have 2 electrical systems. A 12 volts system that runs lights , water pump and heater . Then an AC system that works when you are plugged in for your outlets and microwave .In order to run your AC system off of 12 volts you need an inverter .

Solar Panels

Finally the part everyone wants to know . Now that we know all of the components involved we can start looking at solar panels. The cheapest solar charger out there may not be what you are looking for . Harbor freight has this 1.5 watt charger for $15. That definitely wont run your RV off grid but may work as a trickle charger so your propane detector doesn’t run down your battery.

There are tons of options to fit your budget here . There is a nice chart here which will help simplify things if you aren’t an electrical engineer or dont want to do the math for yourself .

Solar can be a great option for remote camping, but it does have it limitations , you aren’t going to be using your Rooftop air conditioner or Microwave with a small solar setup . But you can run your heat, lights and even TV with the right setup and and Inverter .

Expand Your Grey Tank Capacity

Have you noticed your grey tank always fills up when camping for a weekend? Did you ever wish there was a quick easy way to get rid of some of that water without taking it to the dump station ? You can easily expand your grey tank capacity by using your black tank which never fills up .

As long as both of your tanks dump in the same place you can add a third valve without any tools.

Twist On Waste Valve, Boxed - Valterra.com
Valterra T-58

By simply adding this valve where your sewer cap is , you can open both your grey and black tank valves and allow the water levels to equalize. Since your grey tank is the full tank, the force is higher coming from that tank. Therefore you don’t need to worry about filling your grey tank with sewage.

If you fill both tanks you can always get a portable tank to dump into and take to the dump station. I personally like the tanks that have all the wheels on the ground that you don’t have to lift up once they are full with water .

Amazon.com: Barker (30844) 4-Wheeler Tote Tank - 42 Gallon ...
Barker 42 Gallon

Now that you can get rid of extra water and expand your grey tank capacity see how I get more water to my camper when we camp for long weekends without water hookups on my post here .

Extra Camper Water Tank

Do you ever wish your camper water tank was bigger? Do you wish you could install an extra camper water tank somewhere. If you camper is like most others, you freshwater capacity is much smaller than your dump tanks.

Camping in Ohio, most of the state parks we go to don’t have water at the sites . It seemed like every time we went camping I wish I had about 10 more gallons of water . Every time the kids wash their hand I wish I had an extra camper water tank just for them.

My camper has 1 fresh water tank that holds between 40 and 50 gallons of water. I have one black tank , a grey tank for the bathroom and another grey tank for the kitchen. I don’t know exactly but I have 2 or 3 times the dump tank capacity

First I bought a few more hoses which with my hoses and borrowing hoses from friends , we could add water to our campers if there was water within 300 ft .

My second attempt at a solution was I bought a water jug to fill my tank and used it once. It was heavy and took too many trips . I don’t know what happened to it , it either blew out of my truck bed or a left it a campsite but either way I didn’t miss it one bit.

One day I decided to take my 35 gallon tank and set it up to gravity feed to my camper I just added a hose bib to the drain hole. The tank fits perfectly in between my fifth wheel hitch and the front of the bed. It takes a little while to gravity feed maybe 20 minutes but it works great . The tank stays in my truck bed all of camping season. I eventually hooked up a water pump to the tank just because I bought a new one, but it inst necessary, just speeds up the process a little bit. So i can get back to napping or drinking sooner.

Check out my other posts and feel free share them.

Camper water damage repair

I have repaired other water damage in the camper before but i wanted to share some tips on how i went about it and what materials i used.

This leak was in the back of the camper by the bunks. A few years ago I did a pretty large repair to the back by removing the siding from the outside and replacing wood and insulation.

Leak in back of camper

Disassembly

Because I had it apart from the outside previously I didn’t want to take the inside apart at the same time. Even though I knew there was already water damage to the paneling . So I waited a few years until i was bored one afternoon to take it apart.

One thing I have learned while doing repairs to this camper is that they usually aren’t put together the way you would think. Removing the bunk was just a matter of removing all of the screws . Some screws had been installed from the closet before the paneling was installed in the closet . I had to cut those screws to get things out and then find another way to put it back together. My multi tool has been indispensable for this type of work . Once the bunk was out , it was just a matter of removing the whole piece of paneling . The other piece i had to cut with my multi too since it went behind the wardrobe. I used the old pieces as a template for cutting my new paneling.

Repair and reassembly

Tip – Once the camper wall is opened up , anything that isn’t rotten will usually dry out in a day or 2 .I used a fan inside of the camper to dry it out. I only had to add a little bit of framing inside the wall to give me something secure to staple the new paneling to.

I have found paneling from Menards that has worked to replace the camper paneling. It isn’t the same but it looks nice enough till we try painting it . I’ll let you know how that goes when we get to it. I used a narrow crown stapler to secure the paneling to the studs . I used plastic trim stapled to cover the corners. To cover the staple marks you can just use a white painters caulk .

Check out the roof leak repair around the Antenna i fixed

Awesome Camper Flooring Upgrade

Our camper is 20 years old and we have been wanting to update the flooring for a while.

old flooring

Like most campers it came with linoleum that was installed before the cabinets . Rather than try and remove the old flooring which was in ok shape just not very stylish . I decided to install the new flooring over top the existing . After looking at all the options out there we chose to use armstrong vinyl plank flooring .

I chose it since it is very thin and I dindt think it would interfere or get damaged from the slide out . There wouldn’t be as much waste at using a sheet linoleum product. It is relatively lightweight so it wouldn’t add a lot of weight to the camper.

Instalation

I used a U notch trowel to spread the pressure sensitive adhesive . Be careful with this glue it is runny. It spilled as soon as I opened the lid. But make sure to spread it thin and let it dry before you try putting down your planks. With a fan drying it it took about 45 minutes on a 60 degree day till it was dry. You can tell the glue is dry when its clear. if it still is white then it is not dry . Once it is dry if you try and touch it, it is very sticky.

New Flooring

I first laid out most of my tile and made the cuts and then picked them back up and stacked them so knew where they would go before I put the glue down. Once you put them don they will come back up but they stick very well.

Since I was still nervous about putting the slide out in , I used 2 extra pieces of flooring to lay down before moving it in. It never did touch or scratch the floor . I was even able to pull them back out once it was all the way in. But I think I’ll just keep using them just in case.

New flooring and painted cabinets
What a difference (this picture is before it is all glued down)!!!

The whole project only took a few hours over 2 afternoons. Maybe if I was younger and used knee pads I could have done it in one afternoon. The whole thing cost under $200 and drastically changed the look of our camper. We are very pleased with the results.

After installing the blackout shades this was a great CORONA project to keep updating our camper.

Blackout Shades for Camper

We decided to put Blackout shades in out camper because trying to get kids to take a nap in a camper was getting to be a chore , last year i put vent insulators in to block the light coming in the roof vents. I also bought a roll of bubble foil insulation which i cut to put in the windows in the main areas.

Blackout Cellular Shades

These 2 things made the camper dark inside, almost dark enough that the kids didn’t wake up at sunrise when we were camping .

In the Master bedroom I installed Blackout cellular shades. They were a little more expensive than the foil they were around $30 each, but they open and close easily and they look great . They are easy to install and seem to be more child proof than the mini blinds that were up there before.

Tip ** In wood frame Campers there is always a 2″x2″ square frame around the windows to screw the brackets to.**

Home Depot has these in stock and can cut them to whatever size you need. Just make sure you choose the room darkening ones. especially if you like to nap during the day or put kids to sleep while its light outside.

The Blackout Cellular shades work so good that this year we decided to splurge and put them in the main area of the Camper. The large ones were almost $70 each but the convenience and the look make it all worth while .

Blackout Shades

Here is what we used . Its kind of hard to see them online its much easier to find them in the store

Broken Spring

I pulled into the campground and everyone was making comments. “Your brakes are making noise”.  “It sounds like you have a bad wheel bearing”. I was to busy setting up and getting all the kids settled that I didn’t notice I had a broken spring until a day later .

Broken Leaf Spring
I dont know how or when it happened.

Once i found the problem i started calling around to see if  I could find a new one. I called the camper store i had just left  that i got a new faucet from, they didn’t stock any i also looked at  the tractor supply company website and they didn’t have what i needed.

Knowing it would take  me a few days to get a replacement i had to figure out a way to get the camper home with a broken spring.

I decided to jack up the camper and put a small 4×4 between the spring and the frame  to see if it would give me enough height to be able to drive home.

4x4 inserted above spring

We took off slowly  and i stopped a few times to see if the block stayed above the broken spring .  It stayed in place the whole way home a 1 1/12 hour drive .  I would recommend taking it easy if you have to do this and trying to tie the block in place.  But  because of how my camper was made i wasn’t able to secure the block in place .

Replacement Springs

When we got home I found the springs I needed at etrailer.com . They shipped quickly , I installed the new one and realized I had ordered the wrong size  spring . I had ordered 4,000 Lb springs since the Trailer GVWR is 8310. Because it is a 5th wheel trailer  20% of the weight is on the hitch . 1662 lbs on the hitch  leaves  6648lbs on the axles which only requires a 3500 lb axle and springs.  I called etrailer.com they got me all straigtened out and have a new set shipping right out to me . I’ll have plenty of time get the new ones installed   to go camping in a week and a half. I am replacing both springs on the axle just to be sure they are exactly the same . I am also replacing any worn hangers or bolts that i find while replacing them.

Keep up with this old trailers  mishaps at http://rvlifehacks.com/rv-tricks/

Buy New or Used Camper

The big question is do I buy a new camper , or scour Craigslist and Facebook for a used one? Besides your budget there are many things to consider .

When we first started looking for a camper , I asked about warranties. Did you know new campers come with a 12 year warranty on the roof for the original owner only. The rest of the camper and equipment inside it only has a 1 year warranty.

When I heard that it sealed the deal for me. If i wasn’t going to buy new , there was no reason to even buy a fairly new camper from a dealer . Any camper you buy other than new is as is. For me that really didn’t matter since i know how to fix them and enjoy working on them. Lets look at the pro’s and con’s of both to help you decide whats right for you.

List Your RV for Free on RVshare

Buying New

Pro’s

Comes with a 1 year warranty and 12 year non transferable roof warranty. No one else has slept, cooked or used the bathroom. The camper shouldn’t require any repairs other than routine maintenance. Financing is available for up to 12 years.

Con’s

You may be paying for this camper for 12 years. No one has lived in it and worked out the kinks.

Buying Used

Pro’s

Significant savings over the price of new. The camper has been used and all problems have probably been addressed. You can often find used campers that are practically like new .

coN’S

Camper has no warranty. You must fully inspect the camper or pay someone to inspect it before purchasing. You may not be able to find the layout that you want.

Water Damaged Rear Wall
This can be hiding behind what looks like may have been a small leak

Whether you choose to buy new or used is a personal decision that you shouldn’t rush into.

Rent an RV from RVshare

Did you read my post about choosing a camper. http://rvlifehacks.com/2019/08/11/choosing-a-camper/

Camper Antenna Roof Leak Repair

The first time I inspected our fifth wheel camper I noticed a soft area on the roof around the TV antenna which I would have to repair. We didn’t have a TV in the camper and we never raised the antenna. We had even camped in some pretty hard rains and never noticed any signs of water damage .

I didn’t even know the roof had a leak until a week after it leaked. When I was showing my mother our new camper, she looked in the bedroom and said “you need to wash your sheets”.

My mother isn’t really that demanding or overburdening that she would tell me to wash my sheets or even make my bed so I figured I better take a look.

When I did i saw that the bed was covered in brown water which had obviously come from the roof.

The repair process

In order to start fixing the roof . I needed to gather my supplies first. I had to guess out how much wood I was going to replace . In order to buy enough materials to fix the roof .

To get the supplies i needed I went to my local RV dealer who has some EDPM roof scraps that they sold me . If I remember correctly I bought a piece that was 8’x8′ . Then I went to a local roofing company that had seam tape for rubber roof as well as the solvent to prep the roof for the seam tape.

To repair the damage,I first removed the antenna from the inside. Once the antenna was out I cut away the rubber roof until i could see where the rotted wood stopped. After the demo of the rotten wood out I had about a 2’x2′ section which I replaced.

Water Damaged Roof and Truss

In hindsight I wish I would have taken more pictures to show how I repaired everything but this is all I have. I used plywood to reinforce the water damaged truss. Once this stayed open for a few hours everything dried up . I also used a piece of plywood to reinforce where the antenna mounts to the ceiling.

Patched Roof

Finished

Here is the finished product before patching the rubber roof back on and installing the antenna. Once again there is solid wood to hold the antenna and to adhere the roofing to.

Completed Roof Repair

While it probably wasn’t necessary , I used Dicor 501LSW-1 Epdm Self-Leveling Lap Sealant-10.3 Oz. Tube, White, 10.3 Fluid_Ounces around the edges to make it look nicer and as an extra layer of security.

The antenna I used to replace the old one is a KING OA8500 Jack HDTV Directional Over-the-Air Antenna with Mount and Signal Finder – White, It was easy to install and is simple to operate.

To prevent roof leaks read: http://rvlifehacks.com/repairs/

Choosing a camper

There are many things to consider when choosing a camper or RV.

Your first thing to consider will be a drivable RV or one that will be towed.

You also have to consider where you will store it , what you will tow it with and how many people will be using it .

There are many types of towable campers . Pop-ups, hybrids, travel trailer, fifth wheels, toy haulers and all of these have the option to have a slide out or multiple slides . They all have advantages and disadvantages depending on your needs.

POP UP cAMPERS

Starting with the Pop-up , it is the smallest can be towed by almost anything with a trailer hitch and can sleep up to 8 people . These tiny transformers are an upgrade from a tent and are even available with Air conditioners. They do take some time to setup and don’t have tons of storage . Most pop ups don’t have a toilet or shower.

hYBRIDS

The hybrid campers are half travel trailer half pop up. The beds fold out from the ends and the center is like a travel trailer with a full bathroom and full-size ( camper full size ) refrigerator. These can be towed by a small suv with a tow package.

TRAVEL tRAILER

The travel trailer comes in all shapes and sizes and is the most common type of campers out there. There are many different layouts which are usually abbreviated in the model name.

BH- Bunk House

RK – Rear Kitchen

RL – Rear Living

S-Indicates it has a slide out .

Be sure to look at the trailer weight and know your tow vehicles towing rating before purchasing a trailer that is too heavy. Always use a weigh distribution hitch with sway control to prevent trailers away.

fIFTH wHEEL

Fifth wheel campers are the larger of them all. They are towed by a fifth wheel hitch in the bed of the truck . They are much taller than the other campers and usually have a bedroom in the front over the hitch. Fifth wheel campers don’t experience trailer sway like bumper pull trailers . But you give up most of your bed for the hitch.

Choosing a camper which will work for you is easy, find it may be a little harder sometimes.

Check out my post on buying new or used here